Are you new to archery? Maybe you’ve got an interest in archery, but you’re not quite sure where to start. With so many different types of archery, so much equipment, gear and insider lingo – it can be a bit confusing to a beginner archer.
Well, fear not, this guide will tell you everything that you need to know about archery to get started shooting. We’ll cover the different types of archery, the various styles of bows and what you should pick up to start shooting today.
So if you’re ready, let’s get started:
There are five main types of archery, they are target archery, field archery, hunting, traditional archery and 3D archery, respectively. What types of bow you’ll want will depend on which of these styles you’ll be shooting.
The styles do tend to overlap a bit, many archers that shoot target archery may also shoot field archery and so on. So it’s best to buy a bow that mainly suits your primary style, but is also at least decent for shooting any other types of archery you’re interested in.
Target archery is shot both indoors and out at, you guessed it, targets. These are the typical circle within a circle type targets that you’ve probably seen a million times over the years. In target archery, competitors shoot in a straight line at the targets, and are then scored by a judge.
Field archery is similar to target archery in that archers shoot at (three or four different types of) targets. In field archery, you always shoot outdoors and the targets may be up a hill above you or in a valley below you – they’re not in a straight line like target archery.
There may also be tree branches, brush, or some other type of obstruction partially blocking your view of the target. Archers tend to shoot in small groups, walking a course or path through the woods, stopping to shoot at each target.
Hunting is straightforward enough that it shouldn’t need much of an explanation. Hunters simply use bows when hunting animals that their state or local areas allow them to bow hunt.
Traditional archery is not a standard type of archery with guidelines, rules and regulations like target or field archery. Traditional archers shoot longbows or solid body, wooden recurve bows, just like archers have for thousands of years before.
Traditional archery is more about getting back to the historical styles of shooting, rather than a scored game. There are no fancy bow sights, stabilizers or other modern technology in traditional shooting.
My personal favorite type of archery, 3D archery is similar in some ways to field archery, as you typically walk a course through the woods. The difference being that you are instead shooting at real life sized 3D versions of animals.
You’ll walk the path in a small group, and stop to shoot at each target. There are also 3D shoots and tournaments that offer prizes for the top shooters.
As I said before, the type of bow that you’ll want to buy will be determined largely by which of these styles you intend to shoot. Let’s quickly cover them now:
Modern Recurve Bows
The ‘modern’ in modern recurve bows refers to bows that are made from more than one material and / or have several detachable parts. Unlike one piece wooden recurve bows, modern bows will have limbs made from fiberglass or carbon, while the riser (the center part of the bow that you hold with your bow hand) could be made of wood.
Many modern recurves are also take-down bows, meaning that the limbs are detachable, which makes them much easier to store. Plus, being able to change the limbs means that you can change the draw weight of the bow you’re shooting.
Let’s say that you’re currently shooting a thirty pound bow, but you want to move up to shooting a forty five pound bow. It’s far cheaper to buy a set of new limbs for your bow, rather than having to buy a whole new bow!
They’re Used For: Modern recurves are possibly the most versatile type of bow, as they’re great for almost every style of archery. They’re used in target, field and 3D archery alike. You can also use recurve bows for hunting if you want to, just be sure that you get a bow with a draw weight of at least forty or fifty pounds.
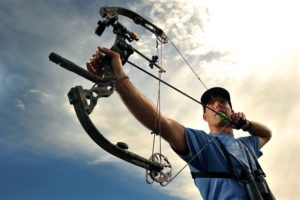
Compound Bows
Compound bows were designed for hunting. Their main benefit being that once you’ve drawn the bow back completely, you only have to hold back a small portion of the bows total draw weight.
Unlike other bows, the cam (gears at each end of the bow) and pulley system supports most of the draw weight of the bow. This allows an archer to hold the bow back for longer periods of time with little effort.
Compound bows are also used in target archery and field archery, but not quite as much as recurve bows, which are the only type allowed in Olympic target archery.
They’re Used For: Compound bows are mainly used for hunting, but they can be used in other types of archery.
Longbows and Wooden Recurve Bows
Longbows and one piece wooden recurve bows are the go to bows for traditional archery. They can also be used in target, field and 3D archery as well.
If you’re mainly interested in traditional archery, a longbow or wooden recurve would be the right types of bows for you. You can still shoot them in other types of archery, but they’re not quite as advanced as many of the more modern bows.
If you’re interested in longbows you could check out this page about longbows vs. recurve bows, or this guide to getting started in traditional archery.
They’re Used For: Great for traditional archery, but can be shot in other types of archery.
Once you’ve figured out what styles of archery you’re interested in as well as the type of bow you’ll need, you’ll need to find the right arrows for your bow.
Today arrows are made from many different types of materials, each one having their own strengths and weaknesses. Arrows are now made from fiberglass, carbon, aluminum, an aluminum-carbon composite and wood, respectively.
If you want an in depth guide on arrows, you can check this one out here.
Proper Shooting Form
There are two factors in archery that nearly all archers will agree are the most important: Form and Accuracy. Proper form is crucial in any type of archery. Being that it’s far easier to learn a good habit than it is to replace a bad one, it’s important to concentrate on having good form from the beginning.
If you’re new to archery, be sure you don’t start out with a bow with a draw weight that’s too heavy for you. It’s a much better idea to start low and work your way up.
Form is especially important to recurve bow archers, as the limbs of a recurve bow are lighter and bad form could torque the bow – causing arrows to veer off target.
Your Shot Sequence
A shot sequence is just another way of saying “everything you do when you shoot each arrow”. So for example: Standing up straight, nocking your arrow, drawing your bow back, aiming and finally releasing the arrow – is the shot sequence.
The following is a beginner shot sequence to get you started shooting today, you can always change it up later on, as you get more experienced at shooting.
Proper Stance
If you’re right handed, your bow should be held in your left hand and you should stand at ninety degree angle to the target. Meaning that the outside of your left foot should be facing the target in a straight line.
Stand with your feet shoulder width apart, focusing on your posture as you draw the bow back. Your eyes should both be open, and should stay focused on the target from before you draw the bow back – until the arrow has hit the target.
Nocking the Arrow
The nock is just the part of the back of the arrow that hooks onto the bow string. Nock the arrow underneath the nocking point (the metal ring on the bowstring). Make sure that you hear an audible click as the arrow nocks onto the bow string.
The index feather (the odd colored feather or vane on your arrow) should be facing away from the bow for most setups. This can vary for compound bows with drop away arrows rests, or other setups.
Bowstring Grip
There are a few different ways to grip the bowstring when you draw back the bow and release the arrow, we’ll cover a couple of them here.
First off, you shouldn’t be holding the arrow at all. If the arrow is properly nocked on the arrow, the nock should hold on to the bowstring by itself. Your fingers should only grip the bowstring itself.
Grip the bow string with the index, middle and ring fingers. Use only the meaty part of your fingers, past the fingertips but not so far that it’s in the first joint of your fingers.
You can either have the index finger above the arrow with the other two fingers underneath the arrow, or you can have all three fingers under the arrow. The first is referred to as shooting split finger, while the other is known as shooting ‘three under’.
Just use whichever one of these feels more natural and comfortable to you. You could also use a release aid if you don’t want to hold the bow with your fingers. A release aid is simply a little gadget that holds the bowstring and releases it by using a trigger.
Drawing the Bow
To draw the bow, draw back the string along your bow arm (your left arm if you’re right handed). You should draw the bow in a straight line back to the anchor point on your face.
Your anchor point is where you hold your draw hand at full draw while you’re aiming at the target. This is normally the chin, nose or upper cheek for most people.
When you draw the bow back, try to concentrate on using the muscles in your back. Your shoulder blades should move towards each other.
Anchor Point
Use whichever anchor point as described above feels most comfortable and natural to you.
If you’re using a bow sight, the bow string should touch both your chin and your nose, this will help when aiming with your sight.
In this anchor point, the index finger is placed just under your jaw bone. Your mouth should be shut with your teeth together. You shouldn’t have anything getting in the way, which means no gum in your mouth.
Ideally, your bow hand, elbow and your draw hand should all be in a straight line when you have the bow back at full draw. Keeping both your shoulders lower than this line, while still keeping a relaxed posture.
Take Aim
Aim at the target. You can use a bow sight or use other aiming techniques if you’re shooting your bow without a sight.
Release the Arrow
Release the arrow by continuing to pull your shoulder blades towards each other, keeping the fingers of your draw hand relaxed enough so that the arrow almost releases on it’s own once you get to the right point.
Follow Through
It’s important to follow through properly with each shot. Don’t be in a hurry to drop your bow down to see how well you shot!
After you release each arrow, wait until you hear the arrow hit the target before you move. Your bow hand will naturally allow the bow to drop if you’re holding the bow properly.
If you’re having trouble with this, you can get in the habit of counting to five before you move after each arrow is shot.
So there you go, your ready to get out there and get some practice shooting. We’ve pretty much covered all the basics, and you can check out other guides on this site if there’s anything things else you need to learn. Now, get out there and have some fun!